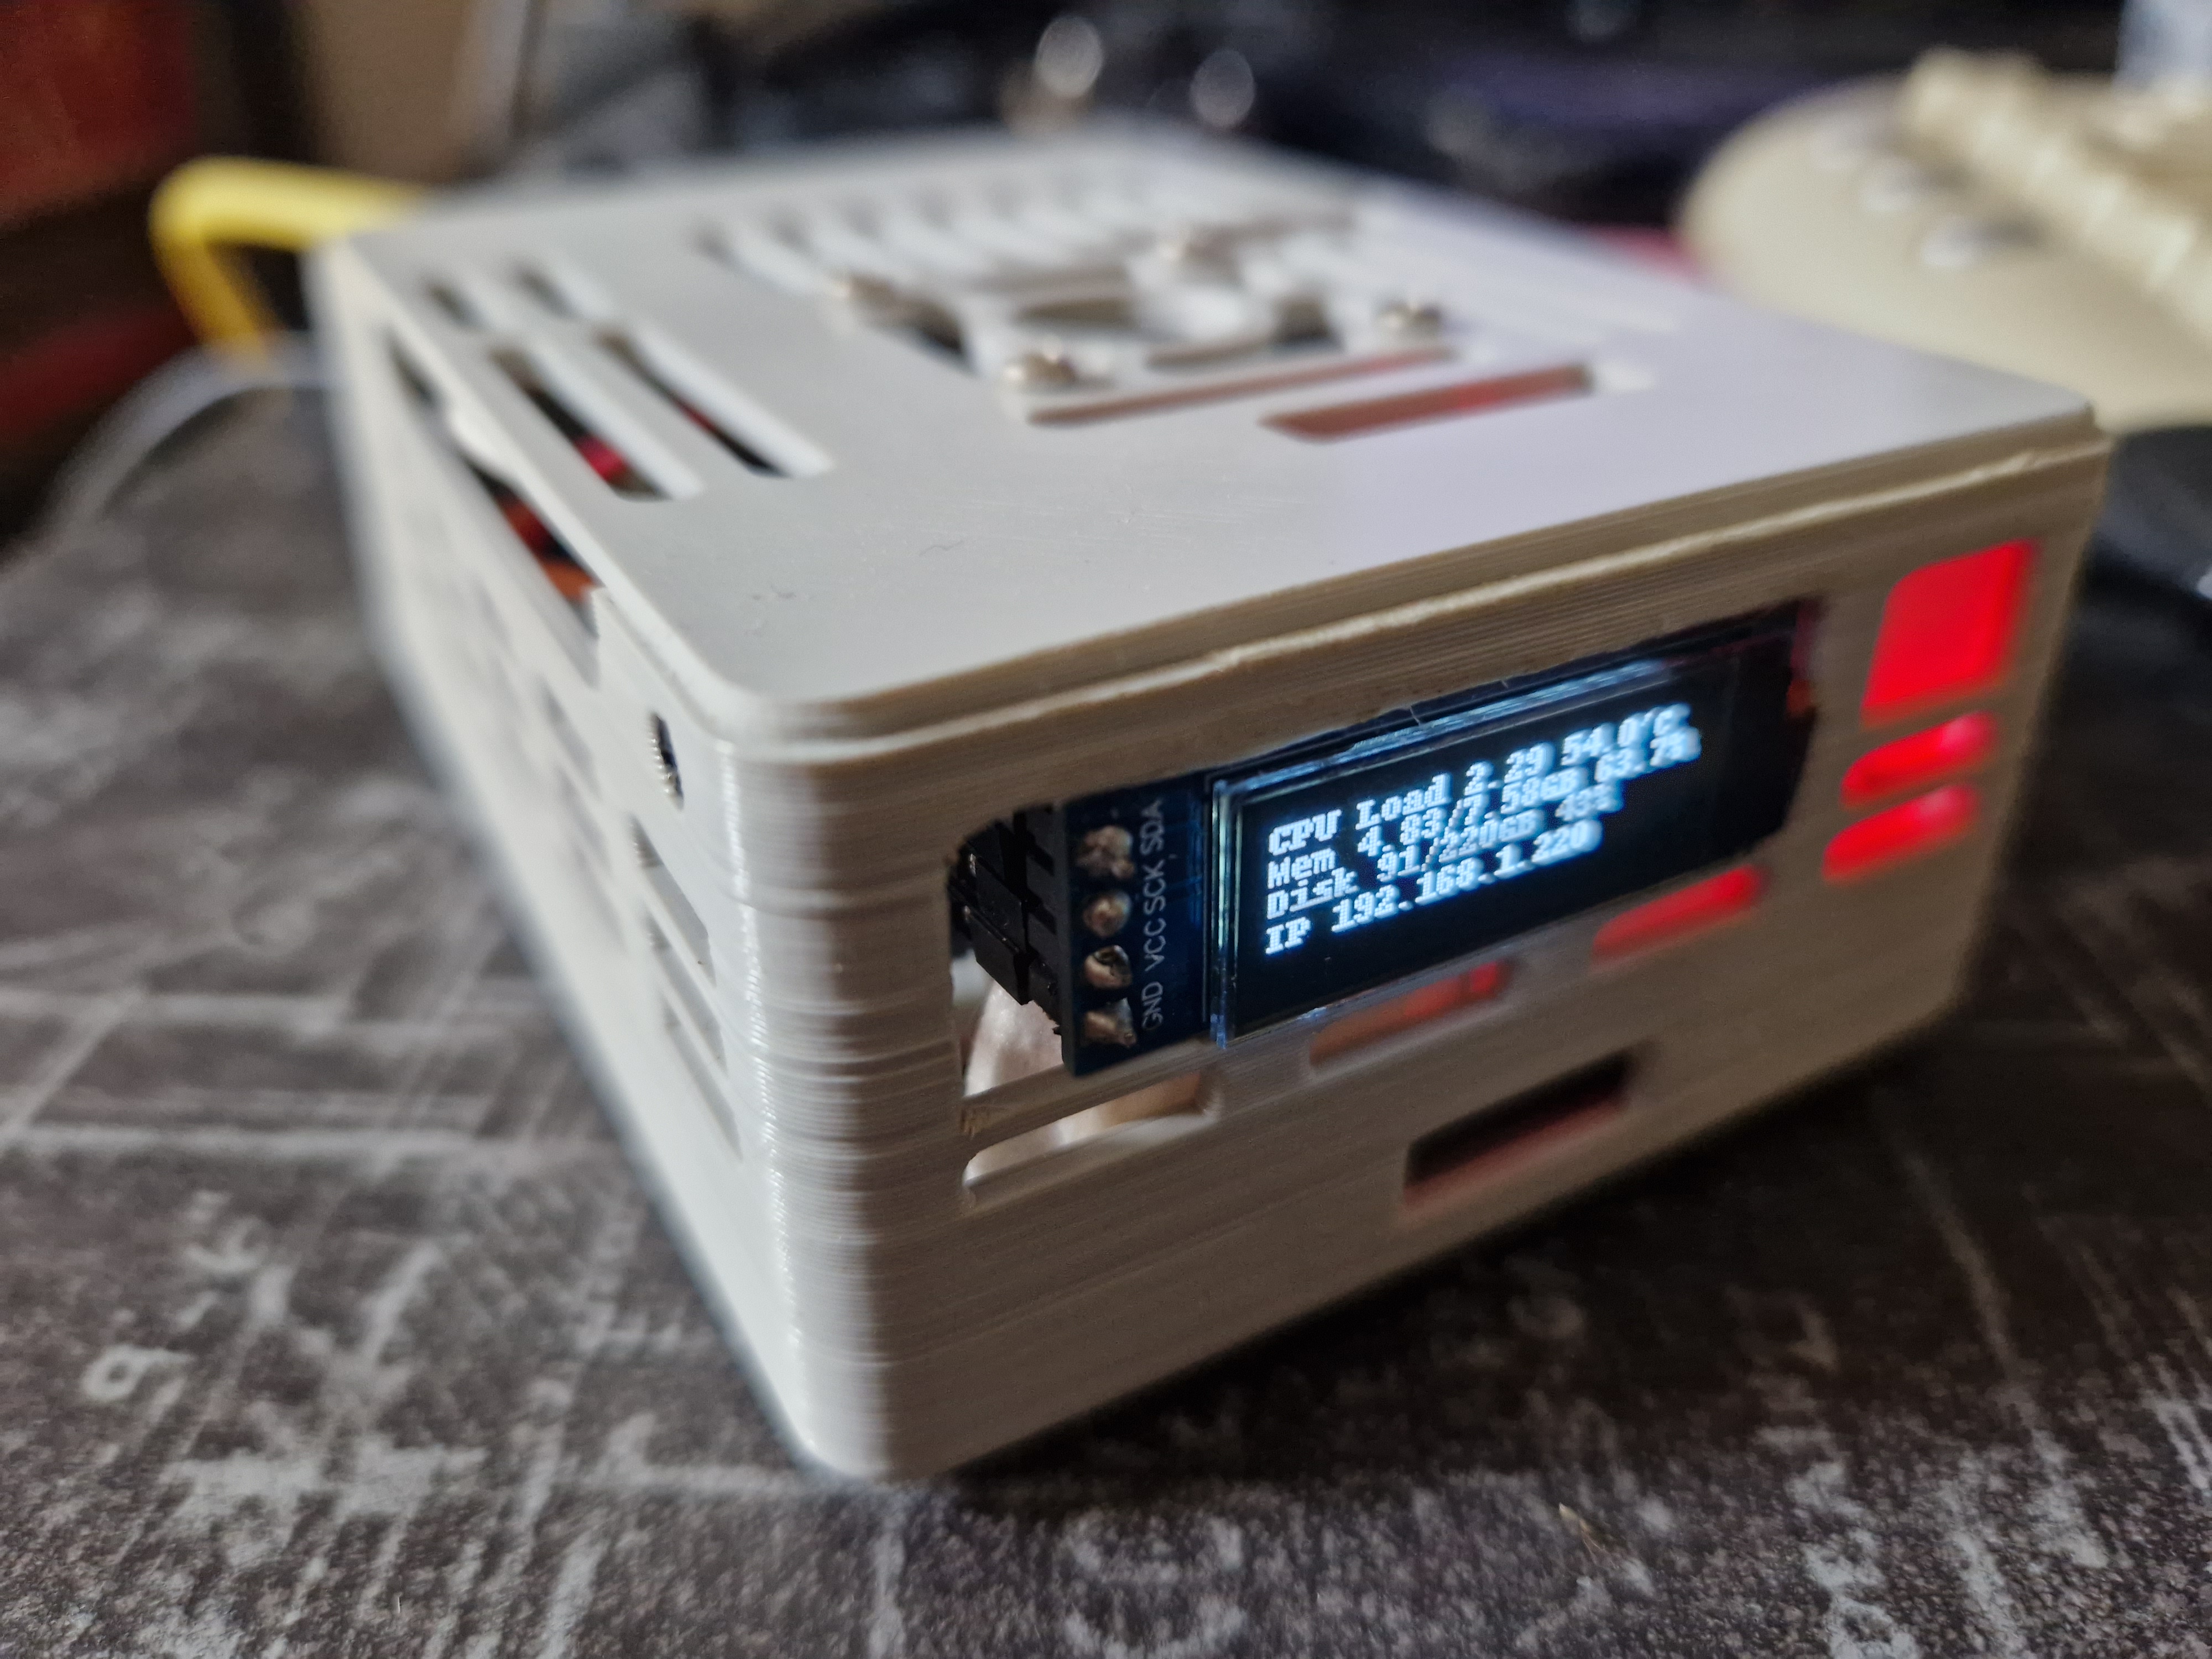
Affichage des stats système sur un écran oled-ssd1306 128x32 via le bus i2c sur raspberry-pi
Installation
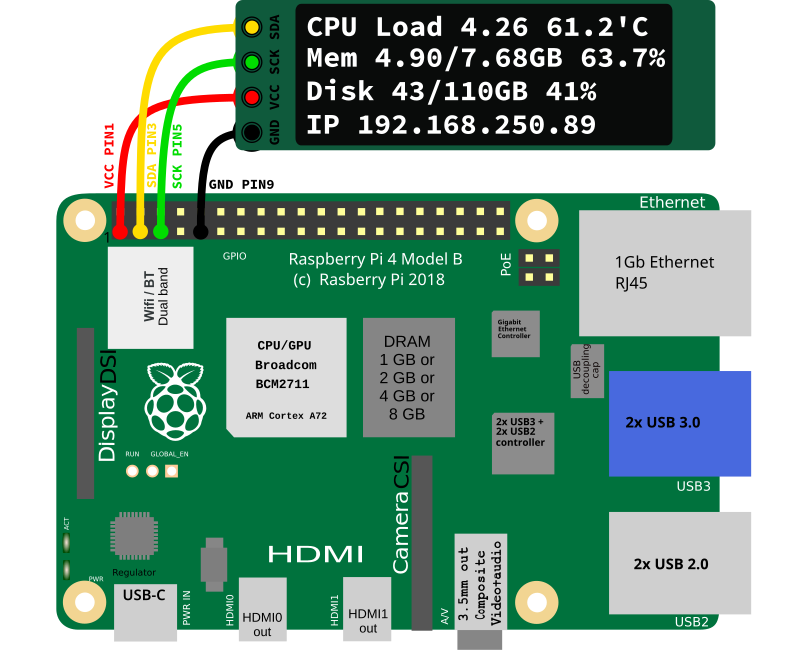
Installation matérielle
Installation logicielle
Il faut que l'interface i2c soit activée, on le vérifie dans le le fichier /boot/config.txt
grep i2c_arm /boot/config.txt | grep onSi ce n'est pas le cas, on ajoute/modifie la ligne suivante dans le /boot/config.txt et on redémarre car ce fichier n'est lu qu'au démarrage.
dtparam=i2c_arm=onPuis charger le module noyau
echo 'i2c-dev' | sudo tee /etc/modules-load.d/i2c-dev.confMaintenant que notre interface i2c est activée, on la teste
sudo i2cdetect -y 1
     0  1  2  3  4  5  6  7  8  9  a  b  c  d  e  f
00:                         -- -- -- -- -- -- -- --
10: -- -- -- -- -- -- -- -- -- -- -- -- -- -- -- --
20: -- -- -- -- -- -- -- -- -- -- -- -- -- -- -- --
30: -- -- -- -- -- -- -- -- -- -- -- -- 3c -- -- --
40: -- -- -- -- -- -- -- -- -- -- -- -- -- -- -- --
50: -- -- -- -- -- -- -- -- -- -- -- -- -- -- -- --
60: -- -- -- -- -- -- -- -- -- -- -- -- -- -- -- --
70: -- -- -- -- -- -- -- --
Installation des outils python disponible dans les dépôts debian
sudo apt install -y python3-dev i2c-tools python3-pil python3-pip python3-setuptools \
    python3-rpi.gpio python3-ftdi rpi.gpio-common python3-luma.led-matrix python3-sysv-ipc \
    python3-usb python3-typing-extensions
Installation de la librairie Adafruit_Python_SSD1306
sudo pip3 install --break-system-packages adafruit-circuitpython-ssd1306Installation des scripts
Fichier /usr/local/bin/stats-start.py
# SPDX-FileCopyrightText: 2017 Tony DiCola for Adafruit Industries
# SPDX-FileCopyrightText: 2017 James DeVito for Adafruit Industries
# SPDX-License-Identifier: MIT

# This example is for use on (Linux) computers that are using CPython with
# Adafruit Blinka to support CircuitPython libraries. CircuitPython does
# not support PIL/pillow (python imaging library)!

import time
import subprocess

from board import SCL, SDA
import busio
from PIL import Image, ImageDraw, ImageFont
import adafruit_ssd1306

# Create the I2C interface.
i2c = busio.I2C(SCL, SDA)

# Create the SSD1306 OLED class.
# The first two parameters are the pixel width and pixel height.  Change these
# to the right size for your display!
disp = adafruit_ssd1306.SSD1306_I2C(128, 32, i2c)

# Clear display.
disp.fill(0)
disp.show()

# Create blank image for drawing.
# Make sure to create image with mode '1' for 1-bit color.
width = disp.width
height = disp.height
image = Image.new("1", (width, height))

# Get drawing object to draw on image.
draw = ImageDraw.Draw(image)

# Draw a black filled box to clear the image.
draw.rectangle((0, 0, width, height), outline=0, fill=0)

# Draw some shapes.
# First define some constants to allow easy resizing of shapes.
padding = -2
top = padding
bottom = height - padding
# Move left to right keeping track of the current x position for drawing shapes.
x = 0

# Load default font.
font = ImageFont.load_default()

# Alternatively load a TTF font.  Make sure the .ttf font file is in the
# same directory as the python script!
# Some other nice fonts to try: http://www.dafont.com/bitmap.php
# font = ImageFont.truetype('/usr/share/fonts/truetype/dejavu/DejaVuSans.ttf', 9)

while True:

    # Draw a black filled box to clear the image.
    draw.rectangle((0,0,width,height), outline=0, fill=0)

    # Shell scripts for system monitoring from here : https://unix.stackexchange.com/questions/119126/command-to-display-memory-usage-disk-usage-and-cpu-load
    cmd = "hostname -i | tr -d '\n'"
    ip = subprocess.check_output(cmd, shell = True )
    cmd = "top -bn1 | grep load | tr ',' '.' | awk '{printf \"Load %.2f\", $(NF-2)}'"
    cpu = subprocess.check_output(cmd, shell = True )
    cmd = "free -m | awk 'NR==2{printf \"%0.2f/%0.2fGB %.1f%%\", $3/1024,$2/1024,$3*100/$2 }'"
    memUsage = subprocess.check_output(cmd, shell = True )
    cmd = "df -h | awk '$NF==\"/\"{printf \"%d/%dGB %s\", $3,$2,$5}'"
    disk = subprocess.check_output(cmd, shell = True )
    cmd = "vcgencmd measure_temp | tr -d '\n' | cut -d'=' -f2"
    temp = subprocess.check_output(cmd, shell = True )

    # Write 4 lines of text.

    draw.text((x, top),    "CPU "+str(cpu.decode())+' '+str(temp.decode()), font=font, fill=255)
    draw.text((x, top+8),  "Mem "+str(memUsage.decode()),  font=font, fill=255)
    draw.text((x, top+16), "Disk "+str(disk.decode()),  font=font, fill=255)
    draw.text((x, top+25), "IP " + str(ip.decode()),  font=font, fill=255)

    # Display image.
    disp.image(image)
    disp.show()
    time.sleep(0.1)
Fichier /usr/local/bin/stats-stop.py
# SPDX-FileCopyrightText: 2017 Tony DiCola for Adafruit Industries
# SPDX-FileCopyrightText: 2017 James DeVito for Adafruit Industries
# SPDX-License-Identifier: MIT

# This example is for use on (Linux) computers that are using CPython with
# Adafruit Blinka to support CircuitPython libraries. CircuitPython does
# not support PIL/pillow (python imaging library)!

import time
import subprocess

from board import SCL, SDA
import busio
from PIL import Image, ImageDraw, ImageFont
import adafruit_ssd1306

# Create the I2C interface.
i2c = busio.I2C(SCL, SDA)

# Create the SSD1306 OLED class.
# The first two parameters are the pixel width and pixel height.  Change these
# to the right size for your display!
disp = adafruit_ssd1306.SSD1306_I2C(128, 32, i2c)

# Clear display.
disp.fill(0)
disp.show()

# Create blank image for drawing.
# Make sure to create image with mode '1' for 1-bit color.
width = disp.width
height = disp.height
image = Image.new("1", (width, height))

# Get drawing object to draw on image.
draw = ImageDraw.Draw(image)

# Draw a black filled box to clear the image.
draw.rectangle((0, 0, width, height), outline=0, fill=0)

# Draw some shapes.
# First define some constants to allow easy resizing of shapes.
padding = -2
top = padding
bottom = height - padding
# Move left to right keeping track of the current x position for drawing shapes.
x = 0

# Load default font.
font = ImageFont.load_default()

# Alternatively load a TTF font.  Make sure the .ttf font file is in the
# same directory as the python script!
# Some other nice fonts to try: http://www.dafont.com/bitmap.php
# font = ImageFont.truetype('/usr/share/fonts/truetype/dejavu/DejaVuSans.ttf', 9)

# Draw a black filled box to clear the image.
draw.rectangle((0,0,width,height), outline=0, fill=0)

draw.text((x, top), "Halt or reboot ", font=font, fill=255)
draw.text((x, top+8), "    in progress", font=font, fill=255)

# Display image.
disp.image(image)
disp.show()
Fichier /etc/systemd/system/stats-i2c.service
[Unit]
Description=Print Monitoring on i2c display
After=network.target
After=syslog.target

[Service]
Type=simple
ExecStart=python3 /usr/local/bin/stats-start.py
ExecStop=python3 /usr/local/bin/stats-stop.py

[Install]
WantedBy=multi-user.target
sudo cp stats-start.py stats-stop.py /usr/local/bin/
sudo chmod +x /usr/local/bin/stats-start.py /usr/local/bin/stats-stop.pyTest du script
python3 /usr/local/bin/stats-start.pyInstallation du service et démarrage avec activation au boot
sudo cp stats-i2c.service /etc/systemd/system/stats-i2c.service
sudo systemctl daemon-reload
sudo systemctl enable --now stats-i2c.service
Et voilà ...
Pour ceux que ça intéresse, le boitier raspberry-pi avec emplacement pour ssd provient de chez freva